The Content Agent writes articles designed to be cited by AI, not just to rank on Google. In the sidebar it is the Content menu: New article, My articles, Opportunities, Performance, Calendar and Setup.
Before you start
- A paid plan: every paid plan includes Content Agent points every month; the free plan does not. See Plans & subscriptions.
- The brand profile: to write in your tone, the agent analyses your site (URL, Analysis, Preview, Ready). On a paid plan it is prepared by itself when you add the site; if it is not ready yet, New article takes you to Content → Setup to finish it.
Starting generation
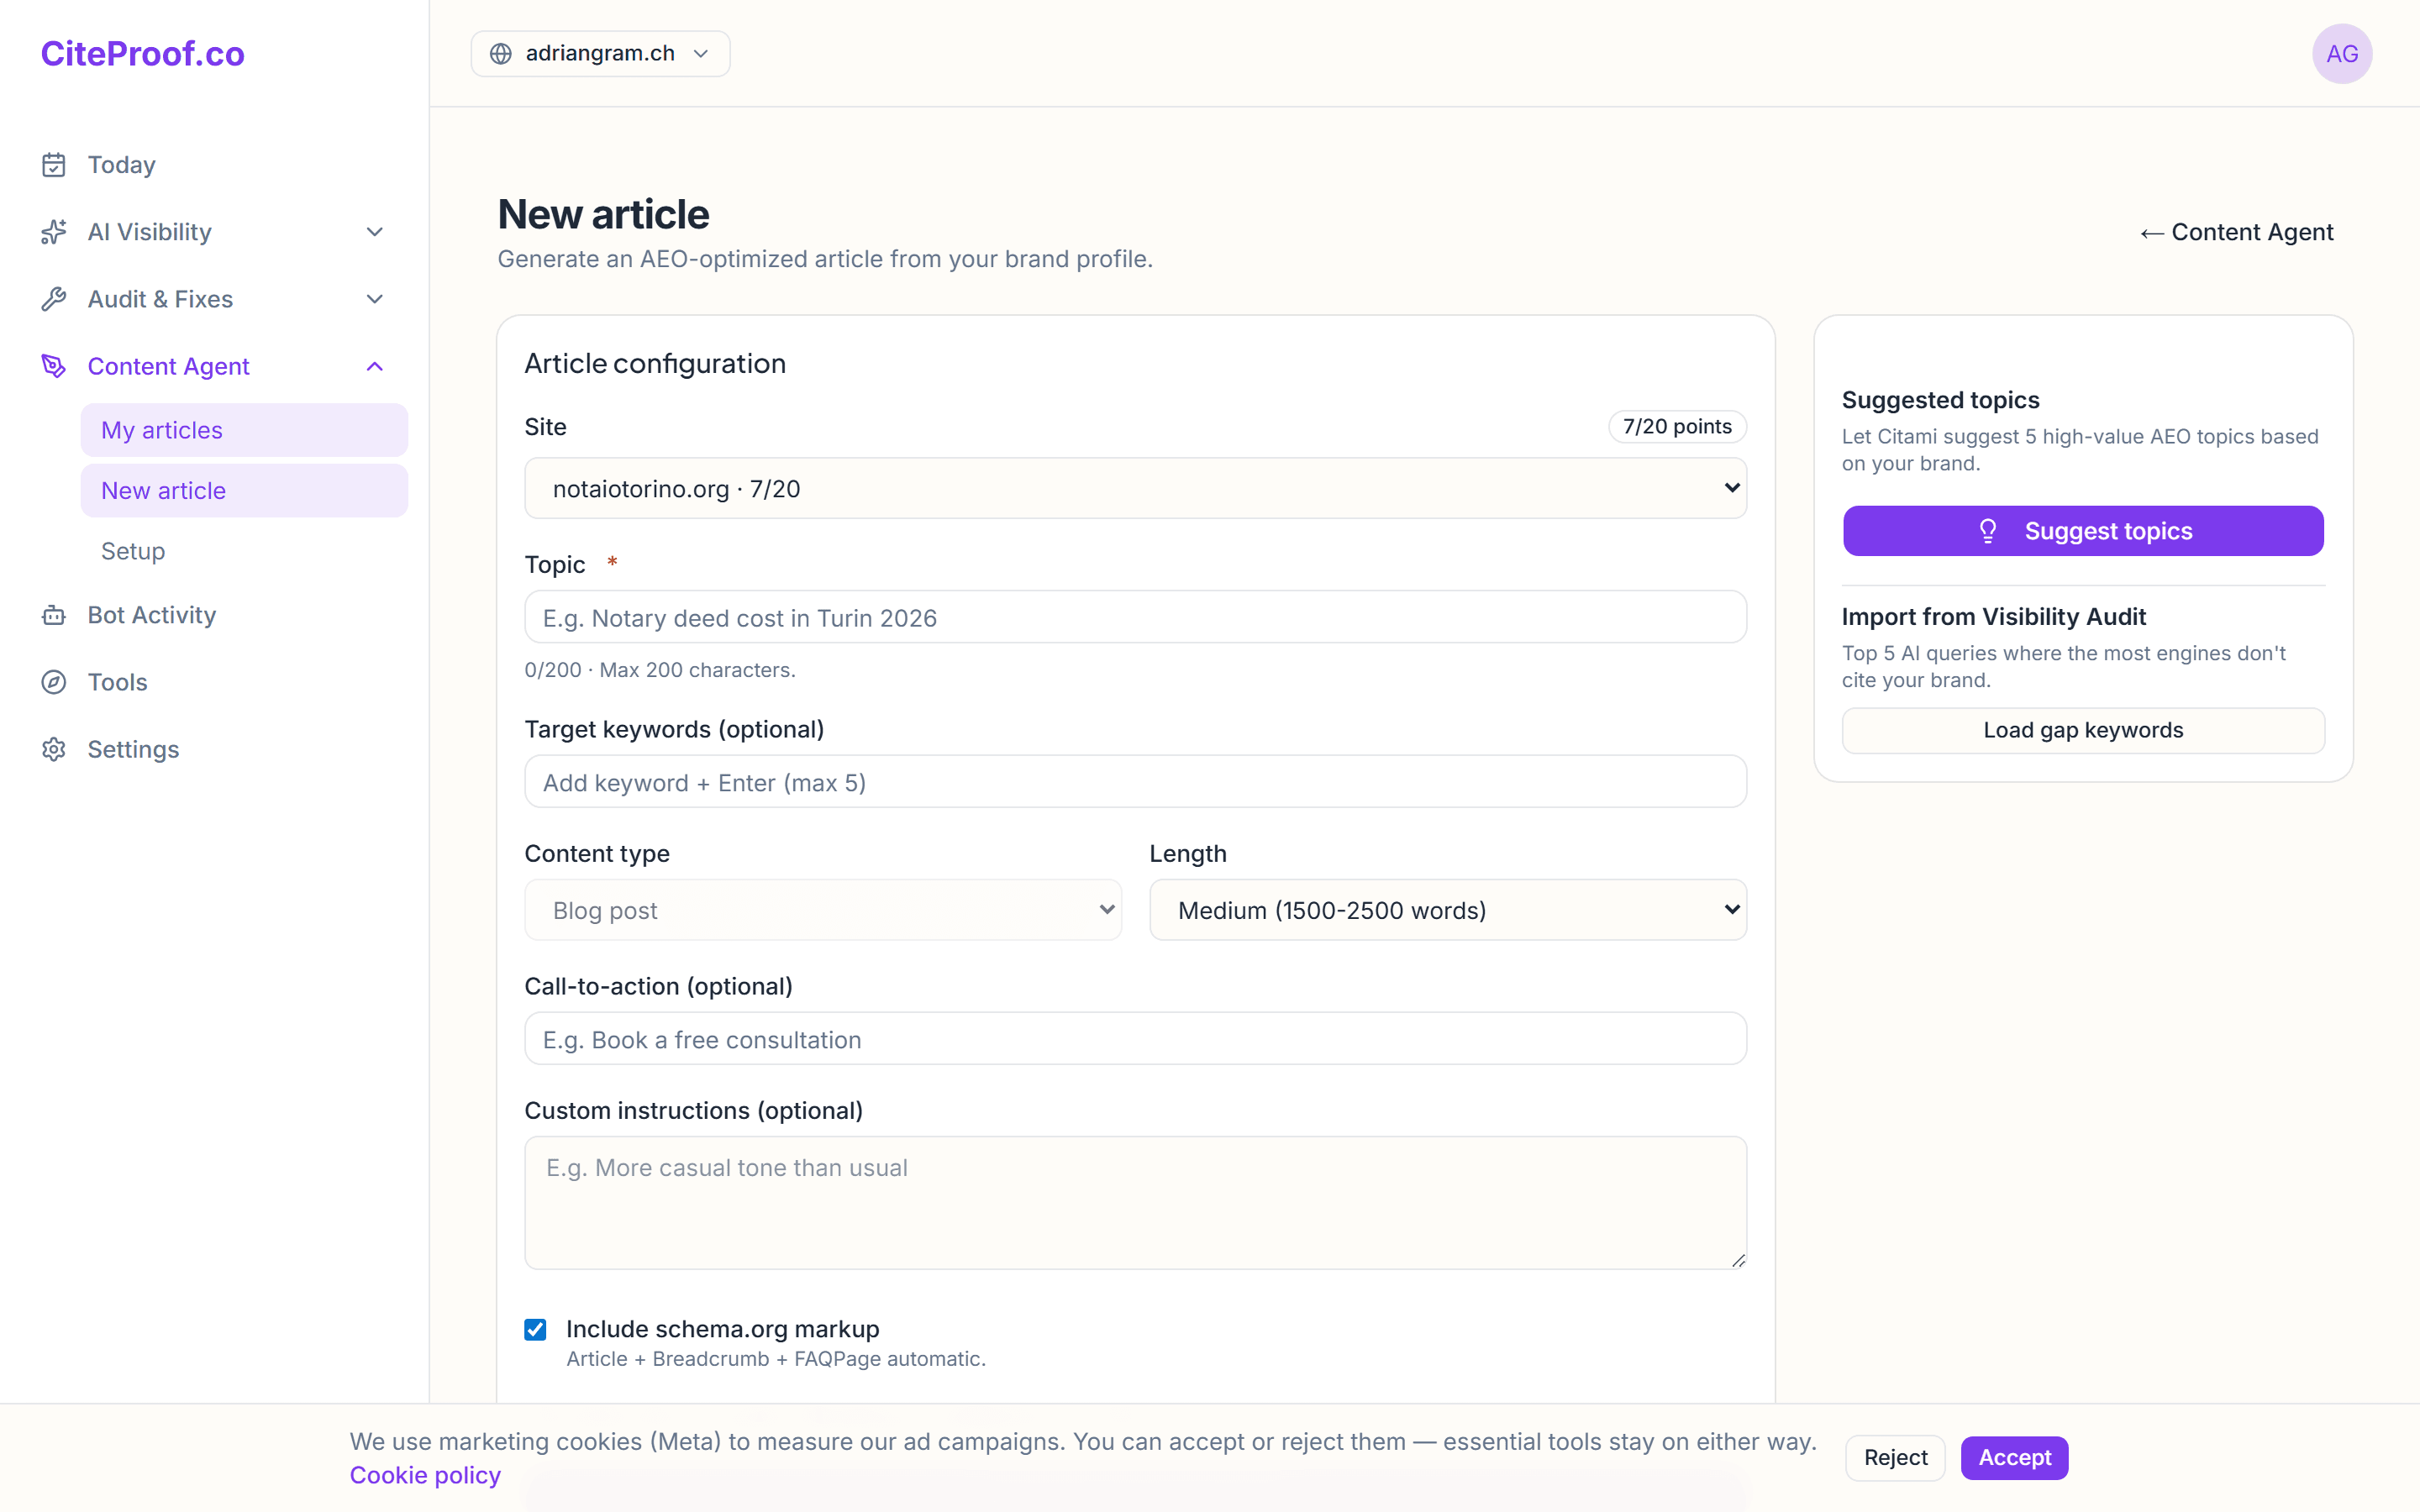
Go to Content → New article. If you don't know what to write about, press Suggest topics: you get five topics chosen for your brand, and Use this topic fills in the form. Otherwise fill it in yourself:
- the site, if you have more than one;
- the topic (up to 200 characters);
- the target keywords (optional, up to 5);
- the length: short (800-1200 words), medium (1500-2500) or long (3000-4000). The content type is a blog post;
- a call-to-action and custom instructions on tone, both optional;
- Include schema.org markup (Article, Breadcrumb and FAQPage, automatic) and Optimize vs competitors, which reads the pages ranking top on Google for that topic and writes to stand out from them.
Press Generate article: the button shows how many points it costs (see Content quota & credits). With Batch mode you can start up to 10 articles at once, one topic per line, with the same settings.
You can also start from Content → Opportunities: the questions where AI cites a competitor and not you, each with its Generate article button.
What happens behind the scenes
- The agent prepares the outline and sources: it reads the pages ranking on Google for that search today and crosses them with your site's data. The article follows that outline.
- It writes the article (title, body, meta description, structured data) and adds internal links to other pages of your site.
- It runs the quality checks (style, legal compliance, plagiarism). On average it takes about a minute and a half.
- It generates the images: a cover and two in-content images, right after the text.
If the checks reject every attempt, the article is marked Failed and the points are not charged: press Retry generation.
Review and edit
When the status turns Ready (or Needs review), open the article from My articles: you have the editor, the HTML preview and the Google results preview. In the Images panel, for each image you can keep the generated one, pick a real photo, regenerate it or upload your own. While the images are being generated you see "Generating images…" and the page refreshes on its own.
Then what?
From the article page you can:
- publish it to your WordPress, Shopify or Wix blog with one click, or Schedule it for a later date (see Publishing to WordPress; on Wix, Fixes and articles on Wix);
- export it as Markdown or HTML;
- turn it into a LinkedIn post, an X thread or a newsletter from Distribute the article.
What happens if the article fails the quality checks?
It is marked as failed and the points are not charged. You can press Retry generation, or change the topic and start again.
Are images included?
Yes: every article gets a cover and two in-content images, generated automatically after the text. You can swap each one for a real photo, regenerate it or upload your own.